Thursday, March 24, 2011

Using static library

To reduce and reuse common code across multiple development projects, the typical development pattern is to use library. Typically library can be static or dynamic, however IPhone development only support static library. The following steps briefly describe how this can be done.
 
1. Create the xcode static library project using the File->New->New Project. Choose Cocoa Touch Static Library, under the Framework and Library tab. Follow through the steps to specify the name and location to complete the static library creation process. Add the source files and header files. Ensure that the project can be build successfully.


2.  In the project that need to use the above created static library, add the static library project file (eg. MyStaticLib.xcodeproj file) by using the Add File to "MyProject" ... menu. Make sure to choose the following option:
  • Uncheck the Destination - Copy files into destination folder (if neccessary) option. This will ensure that the physical files in the static library project is not copied and only the reference to the static library project is created.
  • Select the create group for any added folders option under the Folder selection. **create folder references for any added folders option seem to work as well.
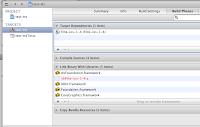
Once the static library project reference is created, the folder structure will be created under the project file as well.


3. Add the static library project into the target dependencies section of the project.
Also add the static library archeive file (eg. libXXX.a) into the Link binary with library section. Make sure that all the iPhone framework (eg. AVFoundation) that is needed by the static library's codes are added to the Link binary with library section as well.

4. The header file for the static library project can be added to the source code in the target project by either of the following way:
  • Use of absolute path to the static library project (eg. import "/user/admin/XXX/xxx.h").
  • Use of relative path to the static library project (eg. import "xxx.h"), but make sure that the absolute path to the static library include files are added to the User header search paths section for the target project's build setting tag under search path section.
Make sure that the target project is recompiled without any library and test the code accordingly.

Sunday, March 20, 2011

Creating UIPickerView

The following steps outline how to create a UIPickerView in an iPhone application.
1. Create the UIPickerView in Interface Builder.
2. Add the IBOutlet for the UIPickerView in the interface file (.h) for the view. Add the @synthesis for the IBOutlet in the objective c code (.m) for the view. (Optional, if the UIPickerView is needed to reference in the code)
eg. in the interface (.h) file
@interface controller : UIViewController {
       IBOutlet UIPickerView *picker;
}
@property (nonatomic, retain) IBOutlet UIPickerView *picker;

eg. in the implementation code (.m) file
@synthesize picker;
3. Link the picker IBOutlet to the UIPickerView in Interface Builder. (optional only if step 2 is followed)
4. The following 1 delegate and 3 datasource methods need to be implemented:
a. numberOfComponentsInPickerView, this datasource method should return the number of components in the UIPickerView. (Optional, only needed for multiple components UIPickerView)
   eg:
   - (NSInteger) numberOfComponentsInPickerView: (UIPickerView *)thePickerView {
         return numberOfComponentsInPickerView;  // this should return the number of components in the UIPickerView
   }
b. numberOfRowsInComponent, this datasource method should return the number of rows in the component.
    eg:
    -(NSInteger)pickerView:(UIPickerView *)thePickerView numberOfRowsInComponent: (NSInteger) component {
          return [componentArray count];
    }
c. titleForRow, this datasource method should return the title of the row in the picker view
    eg:
    -(NString *)pickerView:(UIPickerView *)thePickerView titleForRow:(NSInteger)row forComponent: (NSInteger) component {
          return [componentArray objectAtIndex:row];
    }

d. didSelectRow, this delegated method will be invoked when user select the item in the picker view.
    (Optional, only needed if some action is needed to perform when user select the item on the UIPickerView)
* When there are multiple components in the picker, this method is only called once, when two components are turned together.
    eg:
    -(void)pickerView:(UIPickerView *)thePickerView didSelectRow: (NSInteger)row inComponent: (NSInteger) component  {
          selectedIndex = row;
     }

5. Link the datasource and delegate for the UIPickerView to the delegate implementation in the Interface Builder.

Loading NSArray or NSDictionary with plist file

The content of NSArray and NSDictionary can be loaded from plist file.
The following steps can be used to do that:
1. Create the plist file, by adding new property List file from the resource option.

2. By default, the newly created property list file is of type dictionary <dict>. Change it to array <array> if NSArray is needed. Add in the key and value for dictionary or value for array.

3. The plist file can be loaded to the array using the dictionaryWithContentOfFile or arrayWithContentOfFile method. Typically it is loaded in the viewDidLoad method in the UIViewController.

Eg: For NSDictionary
NSString *path = [[NSBundle mainBundle] pathForResource:@"name" ofType:@"plist"];
NSMutableDictionary *dictionary=[NSMutableDictionary dictionaryWithContentOfFile: path];
Eg: For NSArray
NSString *path = [[NSBundle mainBundle] pathForResource:@"name" ofType:@"plist"];
NSMutableArray *arry=[NSMutableArray arrayWithContentOfFile: path];

4. The writeToFIle method can be used to write back changes to the plist for the array or dictionary object.
Eg: For NSDictionary
[dictionary setVale:value forKey:@"key"];
[dictionary writeToFile: path automatically: YES];